Usually, when we insert an external SSD drive to a Mac, we can easily access files stored on it after the drive is successfully recognized by the Mac computer. Under this situation, we can conduct various tasks on this SSD drive, such as transferring, copying, deleting, or editing files on it, and the like to achieve our goal. However, if the external SSD drive inserted into your Mac becomes unrecognized, what should you do?
The external SSD not recognized on Mac issue is prone to happening for some common factors including unsafe SSD ejection, file system corruption, loose USB cable connection, and more. To make your Mac recognize the inserted external SSD, here are four effective solutions to help you out.
Four Possible Methods to Fix External SSD Not Recognized on Mac
Solution 1. Check the External SSD Connection
A loose or damaged USB connection may result in an unrecognized external SSD. In this case, what you should do is check the connection to confirm if your SSD is properly connected to your Mac. You can connect the external SSD with a different cable or reconnect it to a different Mac to verify if the connection is working.
Solution 2. Perform External SSD Repair in Disk Utility
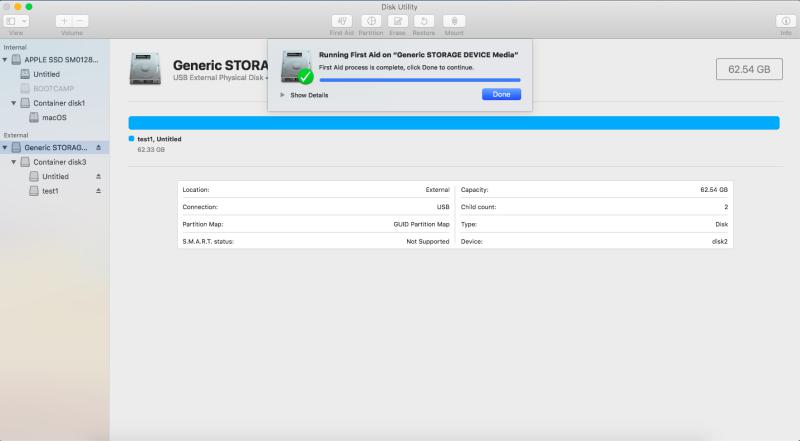
The external SSD gets corrupted, which will make it unrecognized on Mac. To proceed, just go to Launchpad > Other > Disk Utility. Then, select your SSD drive from the left pane and click the Mount option at the top of the interface to get your SSD mounted. If the drive fails to be mounted, use the First Aid function to repair your drive.
Solution 3. Repair Unrecognized External SSD Using Terminal
After performing external SSD repair in Disk Utility, if you are still unable to make your external SSD recognizable, you can proceed to mount and repair your drive using Terminal.
Step 1 Navigate to the Terminal program by going to Launchpad > Other.
Step 2 Type diskutil list, then press the return key in the command-line window.
Step 3 Input the diskutil mountDisk /dev/disk# command and then press return.
Step 4 Input the diskutil repairVolume /dev/disk# command and then press return. When the repair process is finished, you can quit the Terminal program.
Solution 4. Reformat the External SSD Without Losing Data
Reformatting is one of the effective solutions to deal with the external SSD not Recognized on Mac problem, but this operation will lead to data loss. Make sure you have backed your important files up before reformatting the drive. However, if you forgot to make the backup copy of the drive before, and your drive turns corrupted now, use iBoysoft Data Recovery for Mac, a professional data recovery utility designed for data recovery from corrupted, formatted, and unrecognized drives to retrieve your lost data.
Step 1 Download iBoysoft Mac data recovery from its official site, and get it installed on your Mac computer running with Mac OS X 10.9 and later versions.
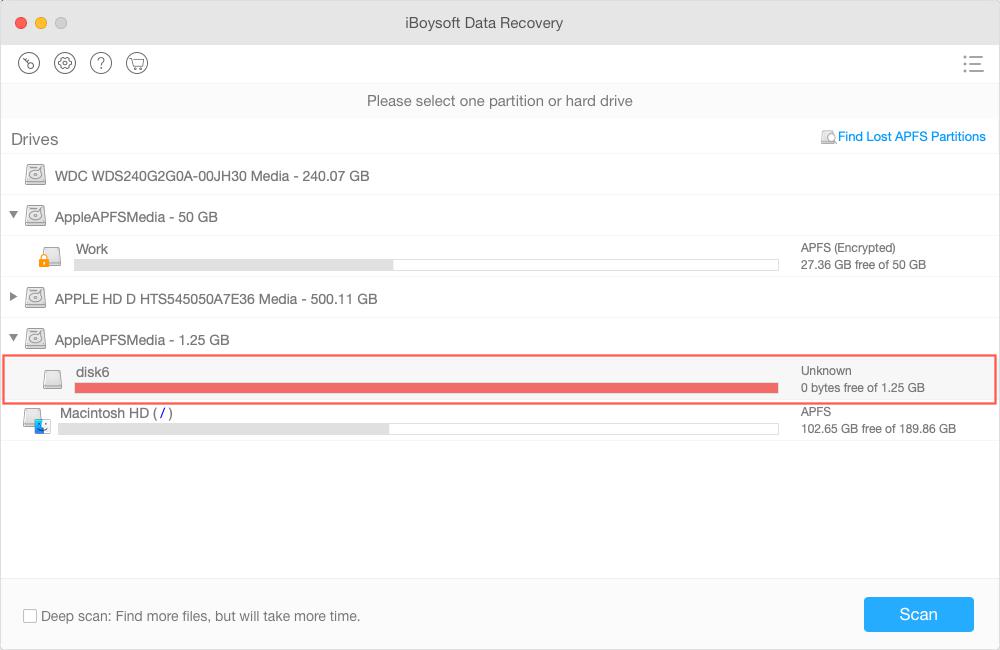
Step 2 Launch this data recovery program, select your external SSD, tick the Deep scan option, and then hit the Scan button to scan the lost files.
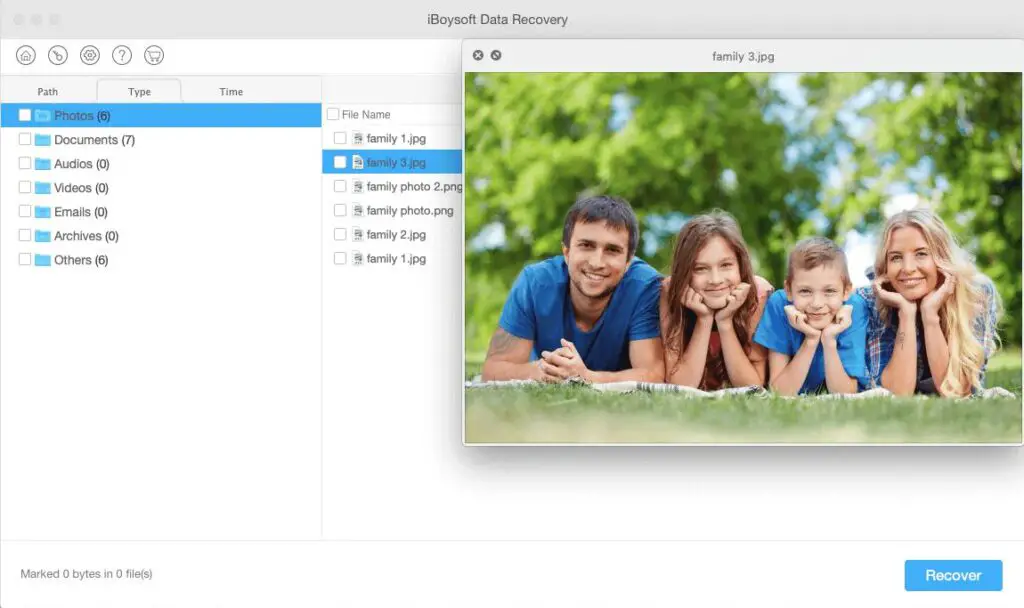
Step 3 Preview the found results when the scanning is complete to search for the files you want to recover. When finding the lost files, just tick them and hit the Recover button to get them back.
After the Mac data recovery, you can try to format your unrecognized SSD connected to your Mac.
Step 1 Access Disk Utility and choose the external SSD listed at the left pane.
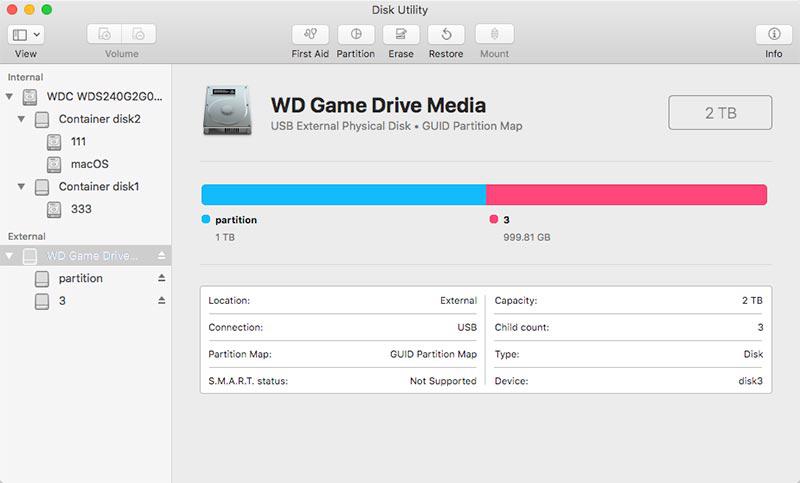
Step 2 Hit the Erase button at the top of the Disk Utility interface.
Step 3 Input the required information including the disk name, format, and scheme.
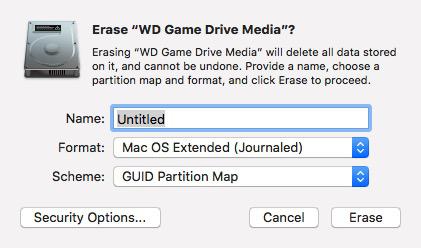
Step 4 Click Erase to complete the reformatting action.
Final Thoughts
External SSDs are good alternatives to flash drives to store a mass of data in a simple and safe way. However, it is always a headache when the SSD becomes corrupted and unrecognized on Mac, especially when there are essential materials stored in the drive, which runs an increased risk of data loss.
When encountering the external SSD not recognized on Mac issue, just follow the methods mentioned above to fix it.
