Sometimes, you may have videos on your iPhone that could benefit from a little editing, such as speeding them up to add some excitement or fit within a specific time frame. Fortunately, you don’t need to be a professional video editor to achieve this. In this article, we’ll walk you through a simple step-by-step guide on how to speed up videos on your iPhone using the built-in iMovie app.
Step 1: Open iMovie
iMovie is a powerful video editing app that comes pre-installed on most iPhones. If you don’t have it on your device, you can download it for free from the App Store. Once you have iMovie installed, open the app to begin the video editing process.

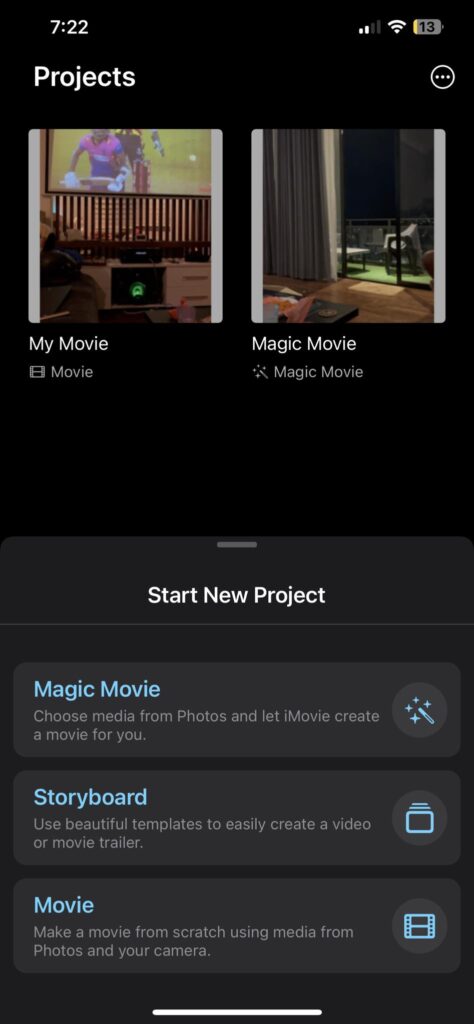
Step 2: Create a New Project
Upon launching iMovie, you’ll be prompted to create a new project. Tap on the “Create Project” option and choose “Movie” from the menu that appears.

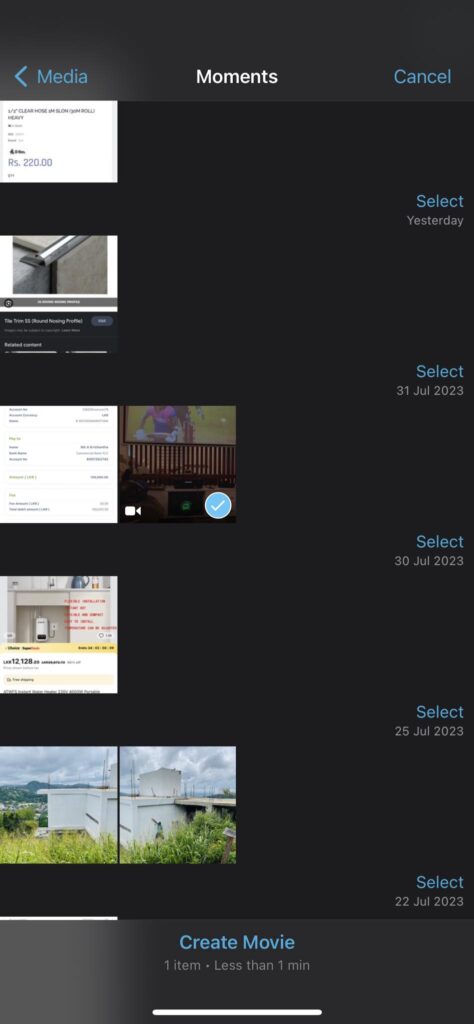
Step 3: Import Your Video
Next, you’ll need to import the video you want to speed up into the iMovie project. Tap on the “+” icon at the bottom of the screen and select “Movie” to access your iPhone’s media library. Locate and choose the video you wish to edit, then tap “Create Movie” to add it to the timeline.

Step 4: Adjust the Speed
Now that your video is in the timeline, it’s time to speed it up. Tap on the video clip in the timeline to highlight it, then tap on the speedometer icon (it looks like a speedometer with a rabbit on it) that appears above the video preview.
Step 5: Choose the Speed Option
iMovie offers several speed options for your video. You can choose from the following:
- 2x: Doubles the speed of the video.
- 4x: Quadruples the speed of the video.
- 8x: Multiplies the speed of the video by eight times.

If you need finer control over the speed, you can also choose “Custom,” where you can manually set the percentage of speed increase. For instance, entering 1.5x will make the video 1.5 times faster.
Step 6: Preview Your Video
After selecting the desired speed, tap on the play button to preview the edited video. This allows you to check if the speed is to your liking. If you’re satisfied with the result, proceed to the next step.
Step 7: Save the Video
Once you’re content with the edited video, tap on the “Done” button in the top-left corner of the screen. iMovie will prompt you to save the video, and you can choose the resolution you prefer.

Step 8: Export the Video
After saving your project, tap on the “Share” button (the arrow pointing upwards) in the upper-right corner of the screen. Select the export option you prefer; for most cases, “Save Video” will suffice. Choose the video quality, and iMovie will export the edited video to your iPhone’s Photos app.
Wrapping Up
Editing and speeding up videos on your iPhone is a breeze with iMovie. Whether you want to create a fun time-lapse video, condense a long clip, or add some excitement to your content, iMovie gives you the tools you need. Remember to experiment with different speeds to find the one that best suits your vision. Have fun exploring the creative possibilities of video editing right at your fingertips!


