Face ID is more than just a way to unlock your iPhone; it has a slew of other uses as well. With Face ID, you can pay for purchases in the iTunes, App, and iBooks Store with Apple Pay while you’re logged into apps. It is possible to utilize Face ID on your iPhone for various purposes once you have set it. This article will show you how to login into applications on the iPhone and iPad Pro using the Face ID feature.
To login into applications up until now, you’ve had to use Touch ID, but now you can sign into them using face recognition technology. It is much more convenient for iPhone owners to use Face ID instead of typing in a code.
- iPhone and iPad models that support Face ID
- Setting up Face ID on the iPhone
- How to use Face ID with password-protected iOS apps?
- Sign in to password-protected websites with Face ID
- How to add an app to Face ID on your iPhone or iPad Pro?
- Turn on Face ID in third-party apps’ settings
- Apps that instantly prompt you to use Face ID
- Final Thoughts
iPhone and iPad models that support Face ID
The following are the devices that are compatible with Face ID:
- iPhone X and later models
- The iPad Pro (12.9-inch display) (3rd generation and above).
- iPad Pro (11-inch screen) (all models)
Setting up Face ID on the iPhone
For Face ID to function with an app, you must first set up Face ID on your device and save your facial data there.
Set up Face ID on your iPad and iPhone by following these steps:
1. Open the Settings app on your iPad Pro or iPhone.
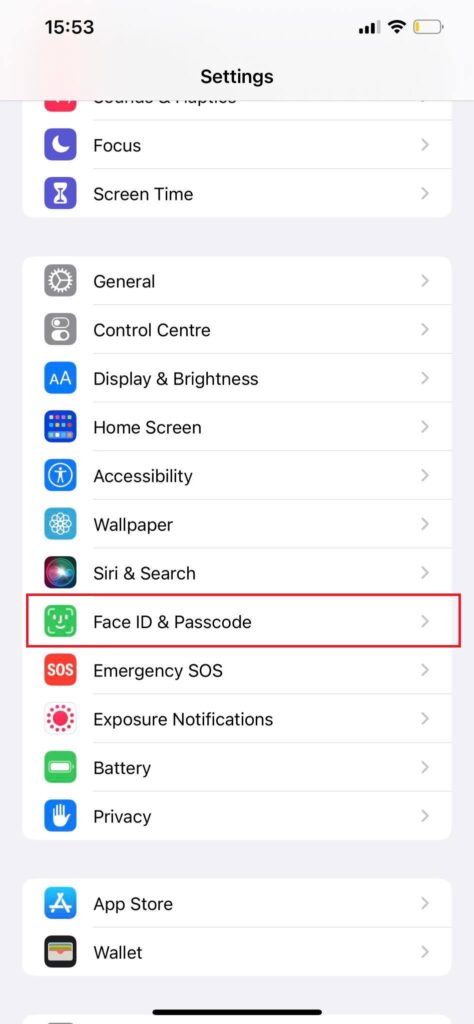
2. Scroll down and choose Face ID & Passcode from the drop-down menu.

3. If requested, enter the passcode for your device.

4. Tap on “Set Up Face ID.“
5. After reading the short tutorial, click “Get Started.“
6. Following that, position your face within the frame.
7. Now, carefully move your head slowly to complete the circle.
8. If you cannot move your head, please click on Accessibility Options and choose Partial Circle from the options.
9. Tap Continue.
10. Now, carefully move your head slowly to finish the second and last scan. Finally, click the Done button.
You have completed the installation of Face ID on your device.
Now that setting up Face ID is completed, go to the following section to learn about the various methods of authenticating applications using Face ID.
Note: To make use of Face ID’s ability to authenticate third-party applications and websites, be sure to enable Password Autofill when configuring your Face ID for the first time.
How to use Face ID with password-protected iOS apps?
Some password-protected applications sign you in with your Face ID for the first time after authenticating using your password and username. Then, when you’ve logged in using your password and username, they’ll ask you to set up and authorize the use of Face ID for sign-in.
When you do so, they will validate future sign-ins using your Face ID. Essentially, you won’t have to enter passwords and usernames again when logging in. Most financial applications make use of Face ID as their default way of logging in.
If you’re using an app that supports this feature, it’ll usually go through the following steps:
- Open an app that has this feature enabled.
- Sign in with your password and username to get started.
- If the app supports Face ID, you’ll be prompted to do so as well. Allow it to happen.
- Whenever you see a new popup asking you to grant the app permission to enable Face ID, just tap OK.
- To set it up, just follow the on-screen instructions.
Sign in to password-protected websites with Face ID
Face ID is a built-in feature in Safari that allows you to sign in to web apps. If you want to start using this option in Safari, you must first enable Password Autofill when configuring Face ID.
To allow Face ID for any website that requires authentication in Safari, do the following:
- Open Safari on your iPhone or iPad to begin browsing.
- To access a website that requires authentication, go to the login page.
- Sign in using your email or password and username.
- You will get a prompt asking you to save your password. Follow the instructions. To save your password, select “Save Password.”
- You are now able to log out of the website.
- Tap the blue “Use [credential]” icon at the bottom of the login screen the next time you wish to log in. You will then be signed into the web app via Safari using your Face ID to authenticate yourself.
What’s the procedure for Google Chrome?
Interested in doing the same procedure with Google Chrome or another browser? There’s nothing to worry about. Once you’ve saved your login credentials in Safari, as described above, entering them in other browsers such as Chrome is a breeze. In Chrome, when you visit the website, you’ll be prompted to pre-fill login fields using previously saved passwords.
To do this,
- Open Chrome and go to the website where you wish to sign in using your credentials.
- Tap the login form field.
- To activate the face scanner, tap Passwords from the keypad’s top row.
- Select the website URL from the drop-down menu to automatically fill in the form fields with the stored credentials.
- Sign in to the website at this point.
How to add an app to Face ID on your iPhone or iPad Pro?
Suppose an app won’t sign you in or unlock with your Face ID, and you’re sure you permitted it to do so before. In that case, you may turn it on in your device settings.
On your iPhone or iPad Pro:
- Go to the Settings menu.
- Select Face ID and Passcode from the drop-down menu.
- Enter your Apple passcode.
- Now select other apps.
- Toggle on the chosen app in which you want to use Face ID to log in.
Please remember that you may only use this option if you have previously granted permission to an app to unlock or sign you in using your Face ID. If this is the case, you will not see the Other Apps option in the drop-down menu.
Turn on Face ID in third-party apps’ settings
You can also enable third-party applications to sign you in or unlock your phone using your Face ID by going into their settings and enabling it.
For example, in the LinkedIn application,
- At the top-right of the screen, tap on your profile icon.
- Select Settings from the drop-down menu.
- Then click on “sign in & security.”
- Scroll down a little more and hit the app lock.
- Toggle on App Lock
- Select your chosen time limit from the drop-down menu under How fast should LinkedIn lock?
- When requested to provide permission for the app to utilize face ID, choose OK.
Please remember that the method described above is not a universal method of enabling Face ID in all third-party applications. The procedure varies depending on the kind of application. As a result, we propose that you experiment with the app’s settings to log in using your Face ID. Additionally, looking at an app’s security choices in its settings might reveal whether or not it supports Face ID authentication.
Apps that instantly prompt you to use Face ID
Some applications enable you to sign in using your Face ID when they are launched, while others need you to wait. They don’t need you to sign in using your login and password the first time you use them.
Apps that utilize this option sync with your Apple ID and then authenticate using Face ID.
Final Thoughts
Using Face ID to authenticate applications on your iPhone or iPad is a simple process. However, although some applications allow you to utilize Face ID by default, some require you to enable it explicitly. Others, on the other hand, do not support Face ID at all.
So, before you attempt to use it with an app, double-check if the app supports Face ID to prevent any misunderstanding later on.


